Intense Liquid Eyeliner by Dior.

Hello everyone!

Today I am reviewing something that is not a Clarins product!  (*-*)  I am reviewing my favourite eyeliner of all time; Dior Intense Liquid Eyeliner. I have tried Clarins & YSL eyeliners before, but found myself liking this eyeliner more. 


Price 
16.500 Omani Rials.


Packaging
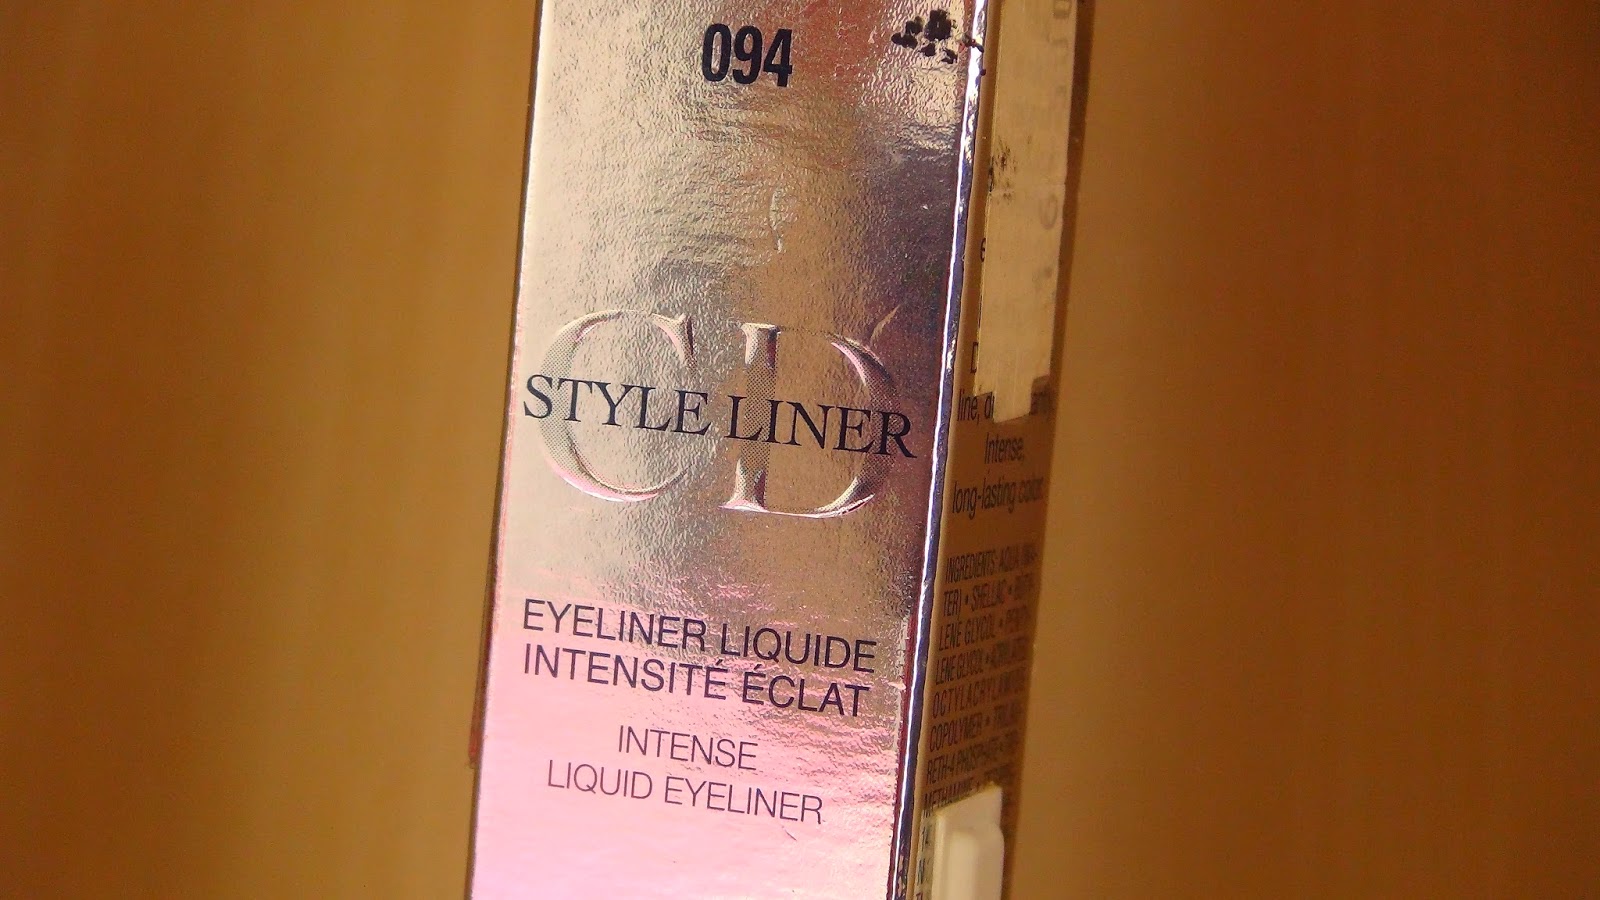
I absolutely love the packaging of this eyeliner & I think it looks very chic! It does not show clearly in the pictures, but it comes in a small sparkling silver flask & the applicator handle is sparkling midnight blue in colour. The applicator tip is extremely fine. 

The only downside about the packaging is that it can be easily scratched, which makes it look old (you can clearly see that in the pictures).


Colours 
It comes in one colour only; 094 - noir black.

How Black is it? 
It is very black. Very, very deep intense black.

Texture 
Texture is perfect; not too thick, but not too fluid either. This ensures that it does not leak out to your eyes while applying it.

Usage 
The extremely fine tip of the applicator ensures that the user can easily control how thin or thick the line is & how much or little of the product itself is needed to apply. Whether you want a thin, think, winged or a very fine angled line, you can easily apply it with this very thin tip. Also, it's rich colour ensures that the user can make a smooth, intense line in a single stroke. It dries quickly, so you wouldn't need to close your eyes and sit waiting for it to set.


Finish 
Matte finish with a hint of glossiness.

Staying Power 
Very long lasting. It doesn't get smudged easily & does not melt even when the weather is too warm, so you don't have to worry about panda eyes at all. It does not flake or fade with time, so you don't have to reapply it again & again throughout the day.

Pros 
Easy to apply.
Glides easily on your eyelid.
Dries quickly.
Very deep intense colour.
Precise creation of angled and thin lines with an extremely fine brush.
Doesn't get smudged easily.
Matte finish with a hint of glossiness.
Not affected by warm weather; does not melt.
Lasts for the whole day!

Cons
Expensive. 
Available in one colour only.


Would I buy it again?
Of course yes! 
I have tried other eyeliners and so far none compare to this. I can see myself purchasing this eyeliner forever! I love how intensely black it is & how easy it is to create very thin lines with it! I am also in love with it's amazing very long lasting power. 
Do I recommend it? 
Yes, I highly recommend this to everyone who would like to create precise lines. With it's deep black colour & it's long lasting power; this eyeliner will give you a classy, chic & stunning look!
Hope you found this review useful. If you have any questions about this eyeliner, please leave them in the comments section & I would be more than happy to answer them for you. Or you can tell me about your favourite eyeliner & why you like it.

Clarins Instant Light Complexion Perfector.

Hello Everyone .. 

Today I'm reviewing another product from Clarins; which is the instant light complexion perfector. I have been using this for about four months now & I would like to share with you guys what I think of this product. Lets start, shall we?


I got this product from "Areej - Seeb City Center" when I was shopping for makeup for my aunt's wedding. I asked the ladies at the Clarins counter for something that is lighter than a foundation, but would work well making my skin nice and glowing & in the same time would do well setting my makeup & making it last for an entire evening and that's when I was introduced to this product. I later found out that it does not only prep skin for makeup, but also helps brighten, tighten & even out the skin tone.

Price: 15 Omani Rials for 30 mL. 

Packaging: the packaging isn't very fancy, but I find it elegant! It comes in a tube with a pump on the top, which ensures that the product comes out cleanly and without any mess. It is also relatively small in size, making it convenient for travel and fits perfectly on a makeup bag so you could use again during the day.

Smell & Texture: isn't strong; smells very nice and natural. The texture is fluid & the colour of the product is light beige. It is absorbed nicely by the skin and it is suitable for all skin types, even for oily skin type, because it doesn't feel oily at all when you apply it on skin.  


Shades: In Clarins international website it says it comes in the following shades for fairer to darker skin tones respectively: 00 Rose Shimmer, 02 Champagne Shimmer, 03 Bronze Shimmer & 04 Gold Shimmer. I heard that in some certain countries they have it in 01 Rose Beige shade too. I am using it in 00 Rose Shimmer shade.
How to Apply: It can be worn with or without foundation according to your personal preference. If you want more coverage & more enhancement for your makeup, then you can apply it before applying foundation or you can simply mix it with foundation and then apply them both together to your face. You can apply it using a foundation brush or simply using your fingertips. 
The way I usually apply it is I simply squirt 1 pump in my palms and then apply it on my well cleansed face. I apply it after my facial moisturizer & before I apply any makeup. It is very good for setting and prepping your skin before applying your usual makeup.
How Much Do You Need? you only need a small amount for your face & neck (1-2 pumps). I have been using this for 4 months now and it still has a lot, so I think it will survive for another 5 more months or so.


Coverage: This complexion perfector is very light. If you apply it alone without mixing it with any other products, it will look as if you're not wearing anything on your face (& this is exactly what I like about it). It will not give you the coverage that a foundation will, but it will make your skin look healthy, glowing and evenly-toned. This is why I would suggest this product for daily use for those with good skin condition, as they will not need much coverage for day-to-day use.
Finish: This product is very light & it's fluid texture allows it to be absorbed very easily & nicely by skin. It evens out skin tone and makes any discolorations or dark under-eye circles less noticeable without giving a greasy finish to skin. It gives a slightly dewy, glowing finish, but not too much.


Pros: 
  • Very easy to apply!
  • Contains anti-pollution complex, which protects from free-radicals & environmental aggressions.
  • Looks very natural on skin.
  • Evens out skin tone.
  • Smooths out the skin.
  • Makes fine lines & dark under-eye circles less noticeable.
  • Natural dewy finish.
  • Gives skin natural glow.
  • May be used as a primer/base.
  • Sets makeup, enhances it & makes it last longer.
  • Doesn't give a greasy finish.
  • Lasts for the whole day.
Cons:
  • Slightly expensive. 
  • Does not have SPF.
Would I buy it again? Yes, I will definitely buy this product again. I love it's light texture, which allows skin to breathe & in the same time preps skin for makeup. I also like that it evens out skin tone & gives it a very smooth complexion. 
Do I recommend it? Yes, I highly recommend this to anyone who would like a light weight coverage, glowing complexion & skin prepped for makeup.. all with just a small amount of the same product!


Hope you found this review useful. If you have any questions about this product, please leave them in the comment section. Also, if you're a Clarins junkie (like me) then Leave me a comment telling me which Clarins products are your favourite & why.

How To | Create Perfect Eyebrows Using Makeup.

Hello Everyone .. 

In this post I am going to share with you a few easy tips that will enable you to have the perfect eyebrow shape. My eye brows are slightly thinner than I would like them to be - I like them thick & strong,  so I usually use makeup to define them & get them in the shape that I like. This is how I do it:


What you need: 

  • An eyebrow pencil or shadow. For more natural looking eyebrows, use powder pencils. I use Dior powder eyebrow pencil.
  • Brow spoolie brush (some eyebrow pencils have this on one end) 
  • Eye shadow brush (only if you use eyebrow shadow)
  • Brow gel. If you don't have brow gel, you can use a transparent mascara. I have been too lazy to go buy brow gel, so instead I use Flormar lash lift transparent volume mascara.


spoolie brush

Simple tips:

  • If your eyebrows are fair, use eyebrow pencil/shadow that is 2 shades darker than your hair.
  • If your eyebrows are dark, use eyebrow pencil/shadow that matches your eyebrows colour.
  • For more natural-looking eyebrows; use powder eyebrows pencils.

Brush your eyebrows:

Start by brushing the eyebrows using a spoolie brush. Brush them in the direction of their growth to make it easier to figure out where they should begin, end & arch.

Eyebrows shape:

  1. To find where your eyebrows should begin; line up your eyebrow pencil (or any other long, thin instrument) from the edge of your nose to the inner corners of your eyes. Mark the place where your eyebrow pencil meets your brow bone - that's where your eyebrow begins.
  2. To find where your eyebrows should end; line up your instrument from the edge of your nose to the outer corners of your eyes. Mark where your instrument & your brow bone meet; that's where your eyebrow ends.
  3. To determine where your eyebrow arch should peak; look straight into the mirror, line up your instrument with the edge of your nose and the middle of your pupil. Where the instrument crosses your eyebrow; that is where your arch should peak. 

Beginning, ending & arching of eyebrows

Filling in the eyebrows:

The thickness of your eyebrows depends on how naturally thick/thin they are & also on your own personal preference; you might like them thick & bushy (like me :3) or thin & well done.
  • Using your eyebrow pencil, line along the upper edge of your brow & then along the bottom edge {I use Dior powder eye pencil. If you're still searching for your perfect eyebrow pencil, then I totally recommend it to you. It is very easy to use & lasts the whole day}
  • With small, gentle strokes; fill in the empty spots between the two edges. Do this until you have covered the entire eyebrow area. Repeat according to how light or dark you want your brows to be.
  • You can top your eyebrows with a layer of eyebrow shadow, but that is not necessary. 

Flormar lash lift transparent volume mascara & Dior powder eyebrow pencil

Dior powder eyebrow pencil

Finishing touches:

  • Brush your brows again using the spoolie brush, to make sure that all the hairs are in place.
  • Set your eyebrows with the brow gel or with the transparent mascara. This helps your eyebrows stay in place.
  • Check your eyebrows.


Avoid:

  • Drawing harsh lines. This will give you scouse brows!
  • Making eyebrows longer using eyebrow pencil; they will look unnatural.
  • Substituting brow shadow with eye shadow. Eye shadow is more pigmented than brow shadow, which - again - will make your brows look unnatural.

Hope you found this post useful. What products do you use to define & fill in your eyebrows? Tell me about them!

YSL Rouge Pur Couture Lipstick in 04 - Rouge Vermillion.

Hello everyone!

Today's post is for all the lipstick maniacs out there :-D .. I'm going to share with you my thoughts and opinion on this lipstick from YSL. It is from the Rouge Pur Couture collection in the shade 04 - Rouge Vermillion. The Rouge Pur Couture has a great range of shades to choose from; there's the reds, the pinks, the purples, the browns & even the nudes, so whatever the shade you're looking for, you will find it in this collection.

What YSL Says about Rouge Pur Couture 

"A new-generation lipstick inspired by Monsieur Saint Laurent’s iconic color palette—red, fuchsia and orange—in a collection of captivating couture shades that offer each complexion a customized look. Lips are saturated with intense, stay-true color, thanks to the Coloreveal Technology while natural extracts provide comforting moisture that lasts all day. Provides medium to full coverage with a radiant, satin finish"


My Opinion on this Lipstick

This lipstick comes in a gorgeous gold container. I think it looks glamorously antique with it's square-shaped packaging! The only thing that I dislike about the packaging, however, is that you can easily get your fingerprints all over it!

This (04) shade is a fresh reddish-pink. It is not too warm & does very well brightening up skin complexionwhich makes it very good for everyday use. It has a slight scent, but not too much.


The texture of this lipstick is very creamy. This makes it very hydrating. When it gets a little dry throughout the day, all you need to do is rub your lips together & it returns fresh and creamy again. It is well pigmented; the colour you get is the same as the tube colour. Being well pigmented makes it long lasting.

The coverage is medium to full & the finish is semi-matte. It feels very light & comfortable on the lips & doesn't leave a waxy feeling on them.


What I like about this lipstick:
Nice packaging.
Well pigmented.
Creamy texture.
Smooth, semi-matte finish; not waxy.
Well hydrating.
Long lasting.

What I don't like about this lipstick:
Expensive.
The container gets fingerprints so easily, so you have to clean it all the time for it to remain shiny! 


This lipstick is quite expensive, but I think it is worth its price with it's creamy, moisturizing texture & full coverage. I also like how well pigmented it is, which makes it very long lasting. I find it very suitable for everyday wear.

If you have this lipstick or any other lipsticks from the Rouge Pur Couture collection, please do tell me what you think of it :-)

How to Make Potato Balls (Katchouri)

Potato balls - or what we call "Katchouri" in Oman - is a side dish that originated in Zanzibar and is a very popular dish here in my country. In this post I will show you how to make this dish. Enjoy!


Ingredients:

  • 4 potatoes.
  • 1-2 tins of Tuna fish {or any other type of fish you like}
  • Some salt.
  • Bread crumbs.
  • 1-2 egg(s), beaten.
  • 3 tablespoons of fresh lemon juice.
  • Finely chopped green chili pepper.
  • Chopped parsley or coriander {if you want a unique flavour}
  • Oil for frying.


Lets get started:

  • Bring a large pot of water to the boil.
  • Peel the potatoes then put them into the pot.
  • Leave the potatoes on until they're cooked.
  • Once they're cooked, mash the potatoes.
  • Add the fish to the mashed potatoes and mix together.
  • Once they're well mixed, add the salt, chili pepper, lemon juice & mix together again.
  • You can add some parsley or coriander if you want, but it is not necessary. They add a very nice unique flavour though! 


Once you've mixed everything together: 

  • Shape the mixture into small balls.
  • coat the balls with a layer of beaten eggs.
  • Then coat them again with a layer of bread crumbs.
  • Put them in the fridge to set for about an hour. This will allow them to firm up.

Potato balls coated with beaten eggs & bread crumbs


After getting them out of the fridge:

  • Put a large fry pan on heat & add some oil.
  • When the oil is warm, start adding your potato balls.
  • Cook the potato balls until they're crisp & golden in colour.


How to serve them:

Once they're cooked, they can be served straight away with some salad or with fresh, cold juice! & that's it! Your "Katchouri" is ready.


Enjoy your Katchouri!


Dior, Clarins & YSL: Which Kohl Pencil is the Best?

Hello Everyone .. 

Because I am a huge kohl addict, I decided that this post is going to be all about kohl pencils. Yaay!
I have been using kohl pencils since I was 14 & I have used many different kohl pencils from various brands, some of which I liked & some I didn't. In this post I am going to tell you about the 3 kohl pencils that I have been using & I will share with you my thoughts and opinions on them. Lets get started: 


Price:
  • Clarins: 8 Omani Rials. 
  • Dior: 11 Omani Rials.
  • YSL: 19 Omani Rials.

The Look:
  • Clarins: I absolutely love the blackness of Clarins' kohl pencil & the pointed tip at one end. It looks very classy & elegant. 
  • Dior: Dior kohl pencil comes with a sharpener & used to have a brush on one end to help with the smudging of the kohl, but they have changed it, so now it doesn't have the smudging brush anymore.
  • YSL: looks very classy in a black & gold pencil.

►Sharpening: they are all very easy to sharpen.


Colours: I am using the following colours:
  • Clarins in 01 - extreme black. 
  • Dior in 099 - noir black.
  • YSL in 1 - black ink.

How Black are They?
  • Clarins: I would say this is more of a soft black in colour.. Not a very deep black. 
  • Dior: not very deep black.
  • YSL: jet black! It is unbelievable how black this kohl is. It is very, very black.

Kohl Texture:
  • Clarins: soft. 
  • Dior: soft.
  • YSL: soft and very creamy.


Usage:
  • Clarins: because of the soft texture & the soft black colour of this kohl, you may need to glide it more than once over the area that you want to apply the kohl on to get the desired dark black colour. This makes it very difficult to smudge it.
  • Dior: It is slightly creamier than Clarins', which makes it easier to reach the desired dark black colour when applying this kohl. Unfortunately, its colour lightens out when smudged.
  • YSL: this is very easy to apply due to its creaminess and its very deep black colour. It glides very smoothly and easily on the water & lash lines without any need to tug it or pull it. It can be smudged very easily to give a smokey eye effect.

Staying Power:
  • Clarins: long lasting if you're staying indoors, but not very long lasting when you go outdoors. It easily melts if the weather is too warm, which can give you panda eyes. 
  • Dior: very long lasting. It is waterproof, smudge-proof & does not melt even when the weather is too warm, so you don't have to worry about getting panda eyes with this one.
  • YSL: long lasting if the weather is cold or if you're staying indoors, but since its very creamy, it easily melts when the weather is warm!

Left to right: YSL, Dior & Clarins.

►& the Winner is: Dior of course!! .. it has all things I want in a kohl pencil: the long lasting power, waterproof & smudge-proof. It does not melt or smear below the eyes in this very hot weather, which makes it suitable for every day use. The only negative feature about this kohl pencil is that it does not have the darkest shade of black, but you can reach the desired shade of black if you glide it more than once on the area that you want to apply it on. 
I will definitely keep on purchasing this Dior kohl pencil & I highly recommend it to all of you kohl lovers out there.

{If you live in a place where the weather isn't very warm, then I would advise you to go for YSL kohl pencil instead, since it would be the most suitable kohl pencil for everyday & special occasions use.} 


Hope you enjoyed reading this post. If you have any questions about any of the products mentioned above, then please leave them in the comment section. You can also tell me which kohl pencil is your favourite & why.

My World in Pictures | July 2013

(old post, reposted)                                                                 
Hello Everyone .. 

In this post, I would like to share with everyone a few pictures that capture some of the little things that happened in my life during July: 


1. My family & I moved to a new house. Mum of course made sure that one of the first things she takes care of is her new little garden.

2. Everyone has to deal with with mum's obsession with everything plants-related.

3. I have been using my phone more than usual lately; calls, messages & more chatting on WhatsApp!

4. I have been able to drive "the big car" more often .. I don't usually drive it, because "it's too big for me" as my parents put it!

5. My sister finally returned home from Germany after being away for 6 months.

6. Ramadan Kareem : )

7. My family & I have been watching movies every night. I love it when everyone is gathered in the TV room, ready for a new movie to watch.

8. Dad got promoted & we had a small celebration. No celebration is complete without Patchi.


July came & went; I hope you spent it peacefully & happily with your loved ones.

Chanel Rouge Coco Shine Lipstick in 80 - Suspense.

                                           
Today's post is about a lipstick from Chanel's Rouge Coco Shine lipstick collection. Rouge Coco Shine Collection includes 34 shades, so there are plenty of different shades to satisfy everyone's taste - or as Chanel puts it: "a colour to match your every desire"! The shade that I like - & the one seen in the pictures below is 80 - Suspense.


What Chanel Says about Rouge Coco Shine

"ROUGE COCO SHINE makes an irresistible desire for lightness flit over your makeup. With its mischievous touch, it glides over lips with all the charm and freshness of a snapshot.
As melt-away as a balm, its lip-embracing texture becomes fluid on contact with the lips and provides a stunning gloss effect with natural shine. Deliciously fresh and soft, it delivers an unforgettable sensation of well-being. 

Lips are enveloped in the incomparable comfort of continuous 8-hour-long hydration thanks to the Hydratender complex, the secret behind the softness of the ROUGE COCO range.
Sparkling with vitality, your smile takes on a new sheer colour, from nude beige to tangy red.
ROUGE COCO SHINE is available in 18 shades infused with luminosity allowing your smile adapts to portray emotion and desire of each day. 
From her first successes to magical encounters, the shade names tell the story of Coco Chanel at the dawn of her destiny. 
Collect a colour to match your every desire!"


My Opinion on Suspense


As you can see; this lipstick comes in a sleek, little black & gold container, which I find very elegant! It has a slight scent, but not too much.

This lipstick is very nice for days when you want a pop of colour on your lips, because it is a bright fuchsia shade. It has bits of shimmer that are quite visible, which makes it sparkle under the sun or under camera flash light. I think all this gives a very summery feeling to it! You can glide it over your lips once, to have a hint of pink, or you can build up the colour intensity - to have a bolder & brighter colour - by simply gliding it over the lips more than once.


The texture of this lipstick is very creamy, which makes it very hydrating. It is like a well hydrating lip balm + a well pigmented lipstick in the same time. This creamy texture however shortens its staying power, making it last for about 3 hours maximum.

The finish is very smooth with some soft glossiness in it. It feels very light & comfortable on the lips & doesn't leave a waxy finish even when you glide it over the lips more than once. Glossiness fades a little over time though.  


Day light                                                                                         Camera flash light

What I like about this lipstick:
Nice packaging.
Well pigmented.
Creamy texture.
Smooth, sparkly finish; not waxy.
Well hydrating.
You can build up the shade or tone it down to a hint of pink.

What I don't like about this lipstick:
Expensive.
Not very long lasting.


This lipstick is quite expensive, but I like its creamy, well hydrating texture. I also like how well pigmented it is & the little bits of shimmer it has. I find it very suitable for everyday wear, especially now during Summer.
Do you like any lipsticks from the Rouge Coco Shine collection? 
Which shade is your favourite?